
Gmail
Gmail, developed by Google, is a widely used free email service that allows users to send and receive emails over the internet.
Off
- How to compose an email
-
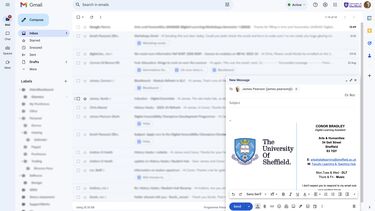
- Log in to your Gmail account using your email address and password.
- Once logged in, select the "Compose" button located in the upper-left corner of the Gmail interface.
- In the "To" field, enter the recipient's email address. You can also add multiple recipients by separating their email addresses with commas.
- In the "Subject" field, enter a subject for your email.
- In the main body of the compose window, you can type your email message. You can use the formatting options located at the bottom of the compose window to format your text, add links, insert images, and more.
- Once you're satisfied with the email, select the "Send" button at the bottom of the compose window. Your email will be sent to the recipients.
- Reply to an email
-

- Log in to your Gmail account if you aren't already logged in.
- Find the email you want to reply to and click on it to open it. The email will open in a new window or tab, depending on your Gmail settings.
- Click on "Reply" or "Reply All" icon located in the top-right corner.
- In the new email window, you'll see the original email's content at the top. below that, you can start typing your reply.
- Once you're satisfied with your reply, select the "Send" button at the bottom of the compose window. Your reply will be sent to the original sender and any recipients you've included in your reply.
- Create a signature
-
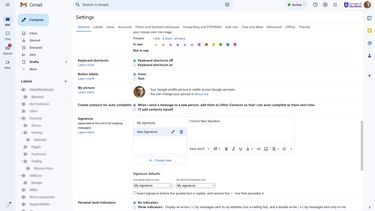
- Log in to your Gmail account if you're not already logged in.
- Select the gear icon in the upper-right corner of the Gmail interface.
- In the dropdown menu, click on "See all settings."
- You'll see several tabs at the top. Click on the "General" tab to access general Gmail settings.
- Scroll down the "General" settings page until you find the "Signature" section. This is where you can create and customise your email signature.
- In the "Signature" section, you can either enter your signature directly into the text box using the formatting options provided, or you can paste a pre-designed signature from another source (e.g., a text editor).
- After creating your signature, scroll to the bottom of the settings page and click the "Save Changes" button to save your new signature.
- To ensure your signature looks as expected, compose a new email. You should see your signature automatically appended to the bottom of the email body.
- How to set up email on your iOS device
-
To set up on your email on your iOS device (iPhone, iPad, iPod Touch) follow these instructions:
- Go to Settings and select Mail
- Select Accounts and then select Add Account
- Select Google and enter your university email address
- You will then be asked to sign into MUSE
- Once you're logged in, select the services you would like to activate. Ensure Mail is active.
- Your should now receive emails on your iOS device's Mail app.
- Please note that it may take a few minutes to connect and download your email.
- Adding University Email to an Android Device
-
You can access your University email account on an Android device by adding it to the Gmail (Google Mail) app. Gmail usually comes pre-installed on Android devices, but if you do not have the app you can obtain it from the Play Store.
Once obtained, open the Gmail app and continue to follow the instructions below:
- In the top right of the Gmail app, tap your profile picture.
- Tap Add another account.
- You will be prompted to choose from a list of mail providers (pictured below), select Google
- You will be prompted to Sign in with your Google Account. Enter your University email address (@sheffield.ac.uk).
- Tap Accept on the next screen and you will then be taken to our University login portal, enter your University of Sheffield username and password (the same details you would use to login to MUSE)
- Once successfully logged in, you may be taken to the Duo authentication screen, in which you will have to approve a push notification sent to your device or enter a passcode from your hardware token to authenticate the login. If you do not have Duo Multi-Factor Authentication set up on your account, please see the MFA portal available on our website for further instructions.
- Your University account will now be added to Gmail. If you do not get taken to this account once you have added it, you can switch to it by once again tapping your profile icon in the top right of Gmail and selecting the University email account (ending in @sheffield.ac.uk).
- You will now have your University account connected to the Gmail app and should be able to check, receive and send mail from your device.